In this post, learn how to tie 5 essential outdoor knots because when out on a hiking tour, you never know when this useful skill might come in handy.
The Square Knot
A square knot is a relatively easy knot to tie. It is useful for tying items down where it isn’t very important whether the knot stays tied or not. This is because it is quite a weak knot and can’t be relied on to tie down critical items which may cause havoc should they come untied. It also should not be used to tie two ropes together. A knot which ties two ropes together is called a bend. Usually when two ropes are tied together, they are not meant to come apart. A square knot is not a good knot for this.
How to tie a square knot
Hold each end of the rope/string in each hand. Then, cross the right rope of the left rope, as if you were beginning to tie a shoe lace. Next, cross the rope that’s now in your left hand back over the right rope and pull tight. You now have a simple square knot.

Image Attribution: Lucas Bosch – https://commons.wikimedia.org/wiki/User:Lucasbosch
The Clove Hitch
For the clove hitch knot, use a single length of rope or string. Loop the end of the rope around the object which you wish to hitch to, and cross it over the remaining length of rope, creating an X shape. Create another loop around the object, this time passing the end of the rope through the loop which you just formed. Pull both ends tight in order to tighten the knot.

The Sheet Bend
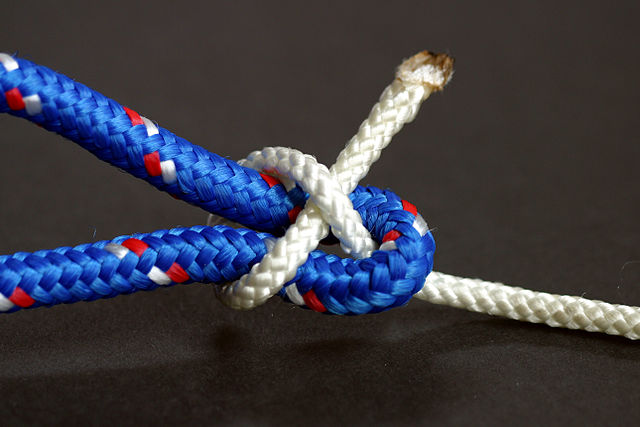
For this knot, you will be using two pieces of rope/string. This knot joins the two pieces together tightly and securely. Fold one of the ropes back on itself, creating a U shape. This is called a bight. It should look like a hairpin bend in a road.
Slip the end of the other rope through the bight from underneath. Wrap the end of this rope around both arms of the bight. Bring it back towards the bottom of the U shape, passing underneath itself but above the bight. Pull both ends of this rope in order to tighten it.
The Bowline
The bowline knot uses just a single rope or string. It never comes loose and is known as the ‘workhorse’ of knots.
Cross the end of the rope over itself, pulling it so that it makes a ‘loop-de-loop’ shape. Pull a short amount of the end of this rope back through that loop, threading it loosely. Pass the same end underneath the remaining rope. Bring the end back up and pass it through the first loop-de-loop shape. Hold the short end of the rope and the loop tight, while pulling on the other end of the rope to tighten.

Two Half Hitches
For this knot, you will need one length of rope or string, and something to hitch it to such as a post or ring. We will use a metal ring for this example, as if for a hammock.
Pass the end of the rope through the ring from below. Pass it underneath the remaining rope, forming a circle. Bring the end back through that circle. Pull it tight to complete one of the two half hitches. Repeat this process to create the second half hitch. Pull the two ends of the rope so that the knot tightens.

We hope that you enjoyed this guide to 5 Essential Knots: How To Tie Outdoor Knots. If you are interested in a self-guided hiking holiday, check out hillwalktours.com
